
A Beginner’s Guide to Pottery
WARNING!
Pottery can be addictive! It is a wonderfully creative process – something between art and craft, with some technical know-how thrown in. But you can lay awake at night wondering how to improve your skills. Or wake up early in the morning to check how your firing is going. You might think about pottery more than you would like to. I speak from experience. You have been warned!
First the basics:
Pottery is roughly divided between earthenware and stoneware. After a pot is made it is usually fired twice. First the bisque firing – between 990° and 1040°c. Both earthenware and stoneware are bisque fired first. After bisque firing and glazing, earthenware is fired to a lower temperature – 1080°c. While stoneware is fired to 1280°c. Why the fuss about earthenware and stoneware? Generally, earthenware is more brightly coloured (glossier) and decorative whilst stoneware is more durable and functional – stoneware is usually microwave, dishwasher and oven-proof. And both clay and glazes are either for earthenware or stoneware. You cannot put earthenware clay or earthenware glazes into a stoneware firing. With stoneware, you also have the decision of reduction firing (gas) or oxidation firing (electric) but let’s not go there now. And that’s enough technical stuff for now.
Wheel Work
Most of the work I do is on the wheel, so this blog is concentrated on this. Again, basic steps:
Stage 1
- clay has to be wedged – to ensure there are no air bubbles in it (air bubbles equals potential explosion in the kiln)
- clay is then “thrown” onto the wheel
- there are only 2 basic shapes – which most other pots come from – the cylinder and the flowerpot
- Once the basic pot is made it is left to dry to “leather-hard” state
- It is then “turned”. Turned upside down and the base trimmed to make a nice foot
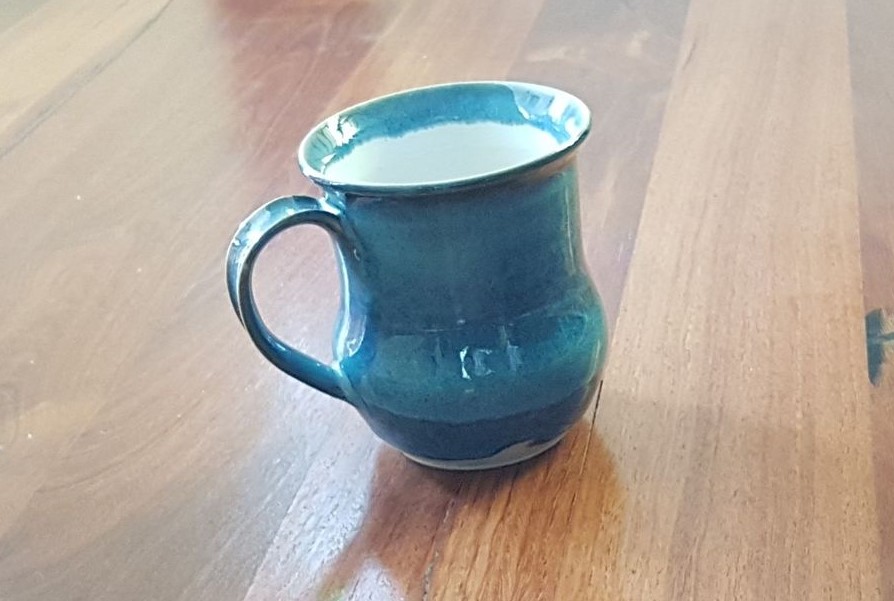
- If this is going to be a mug with a handle, now is the time to “pull” the handle and attach it to the mug
- The pot is left to dry completely
- I then usually give the pot a once over with a piece of green scouring pad (no water!) – very technical, I know 😉 and add my signature
- It’s now ready for bisque firing
Stage 2
- the pot is wiped with a slightly damp sponge (there is usually clay dust on it which will impede the glaze)
- usually, I will dip the base of the pot in molten wax – so that the glaze does not get too close to the bottom of the pot
- assuming the glaze(s) are ready to go – pot is glazed
- base is then checked again to ensure no glaze is there (you absolutely do not want to grind glaze off a kiln shelf!)
- now the glaze firing. And you wait expectantly for the wonderful pots and expect that there will be a few disasters
- Then you do it all again
Discover more from Travelling Gomezs
Subscribe to get the latest posts sent to your email.
- Posted in: Pottery ♦ The basics
- Tagged: beginners pottery, Pottery, pottery basics, throwing, wheel work
